Create new partitions on windows 7 hard disk
 |
| Create New partions in windows 7 |
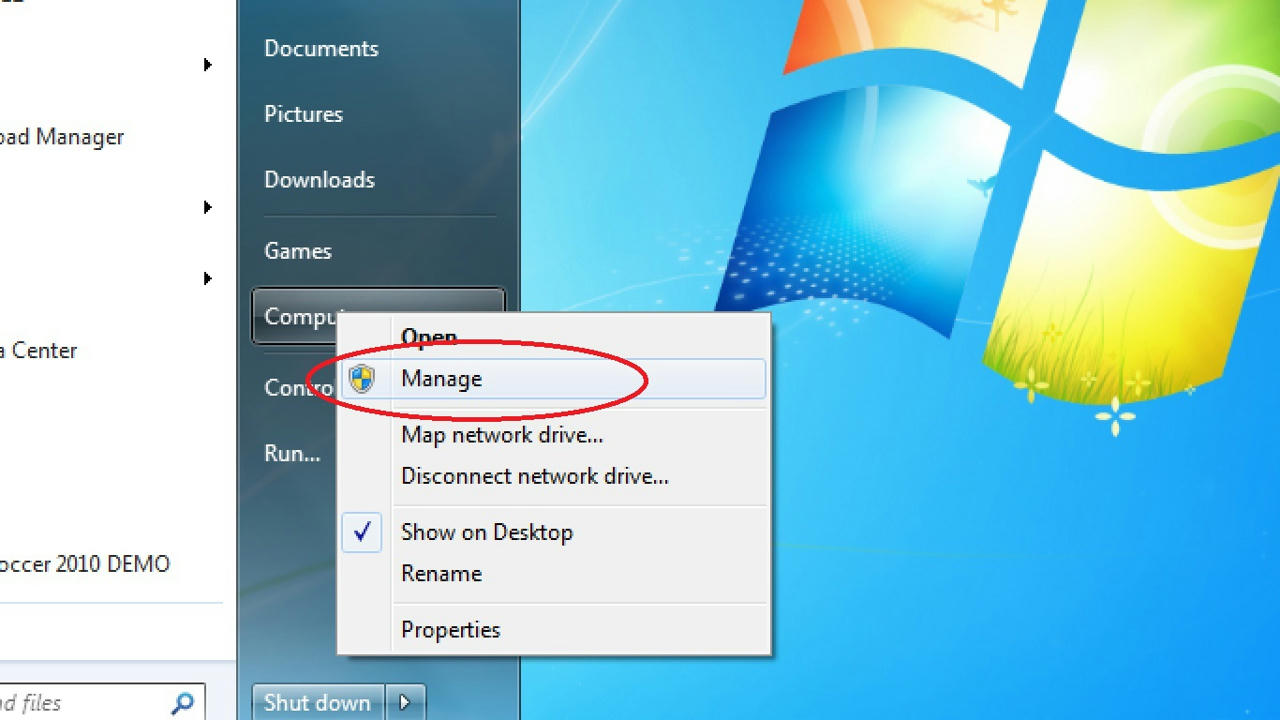
Step 1: Right click Computer and select Manage.
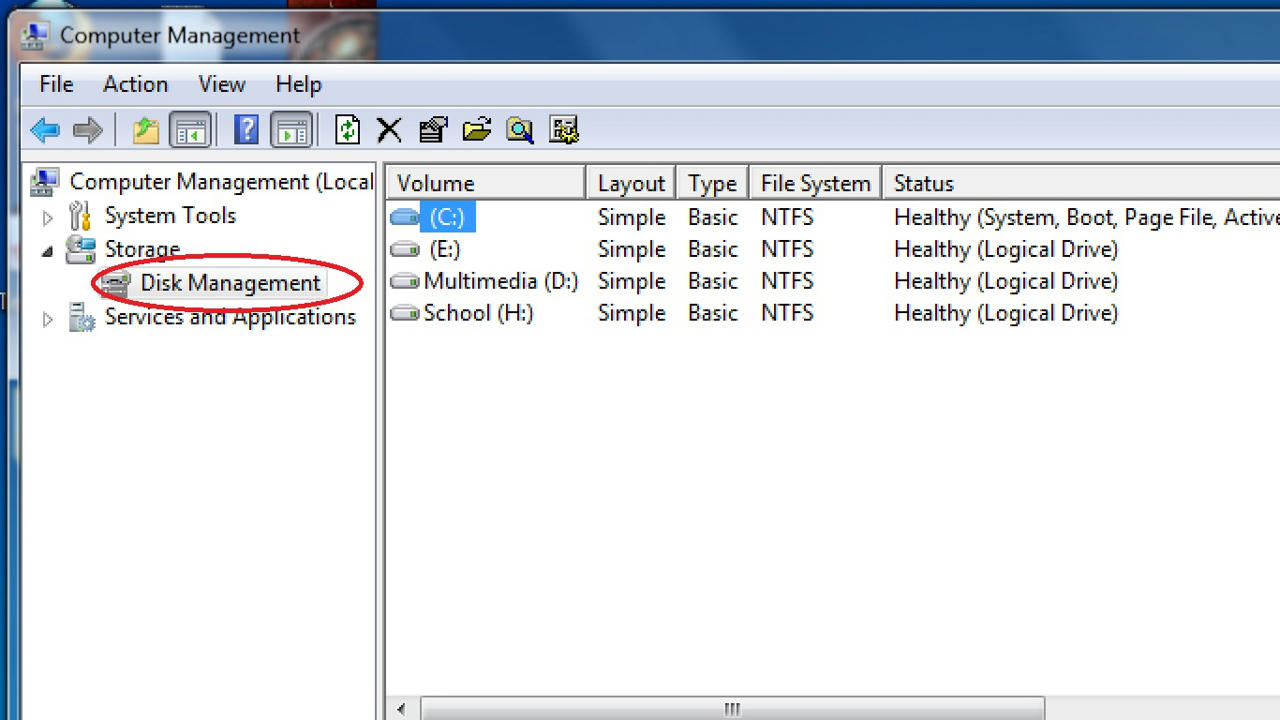
Step 2: Select Storage > Disk Management.
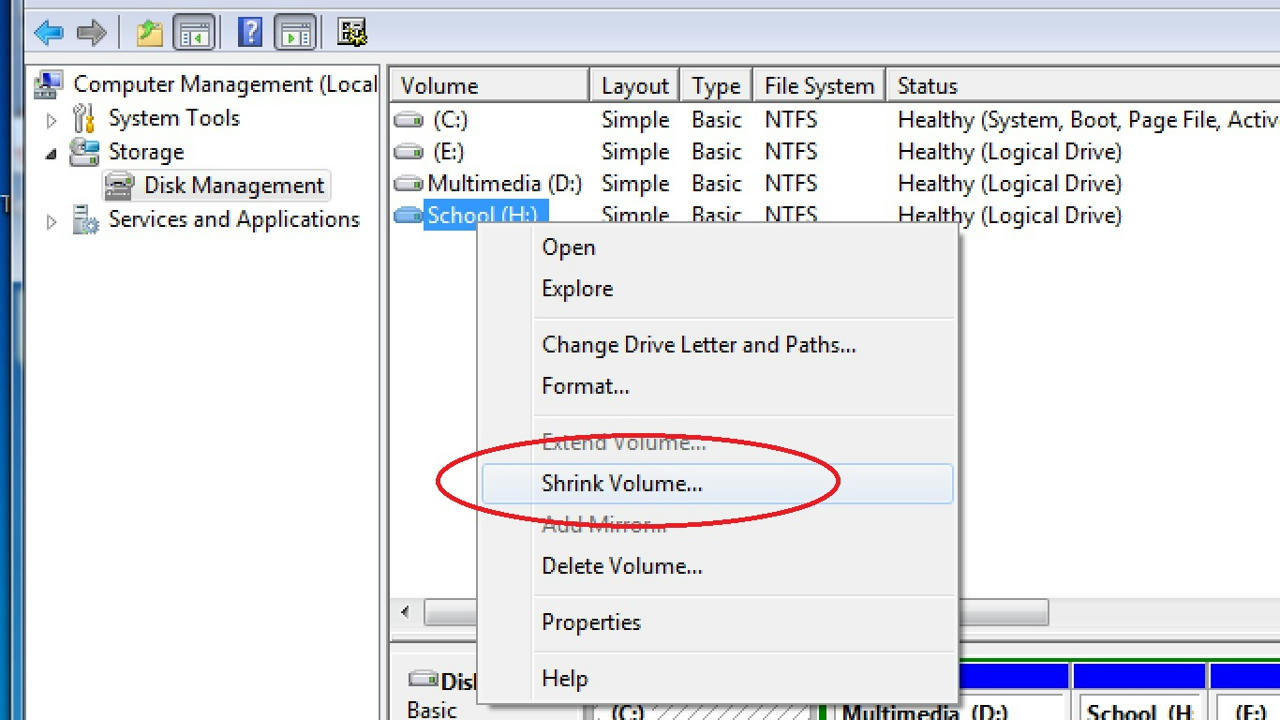
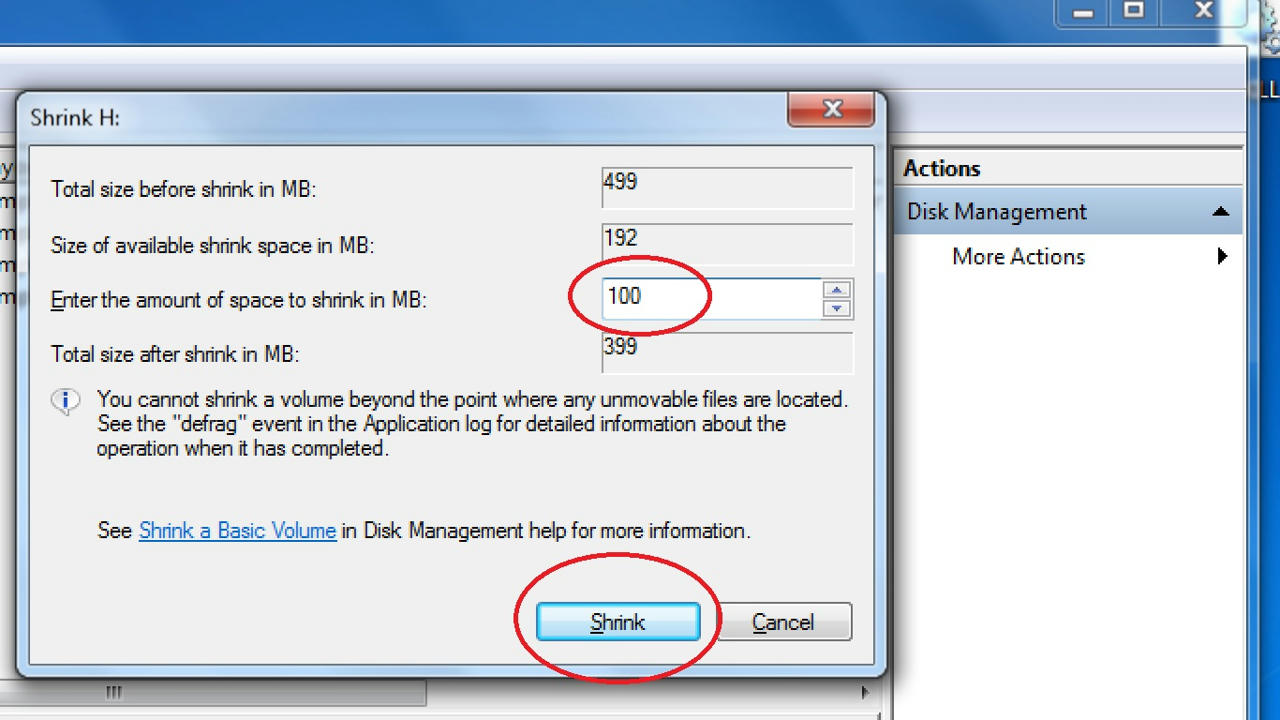
Step 3: Right click any volume and select Shrink Volume... from the menu.
Step 4: Enter the amount of space in MB to shrink and click Shrink.
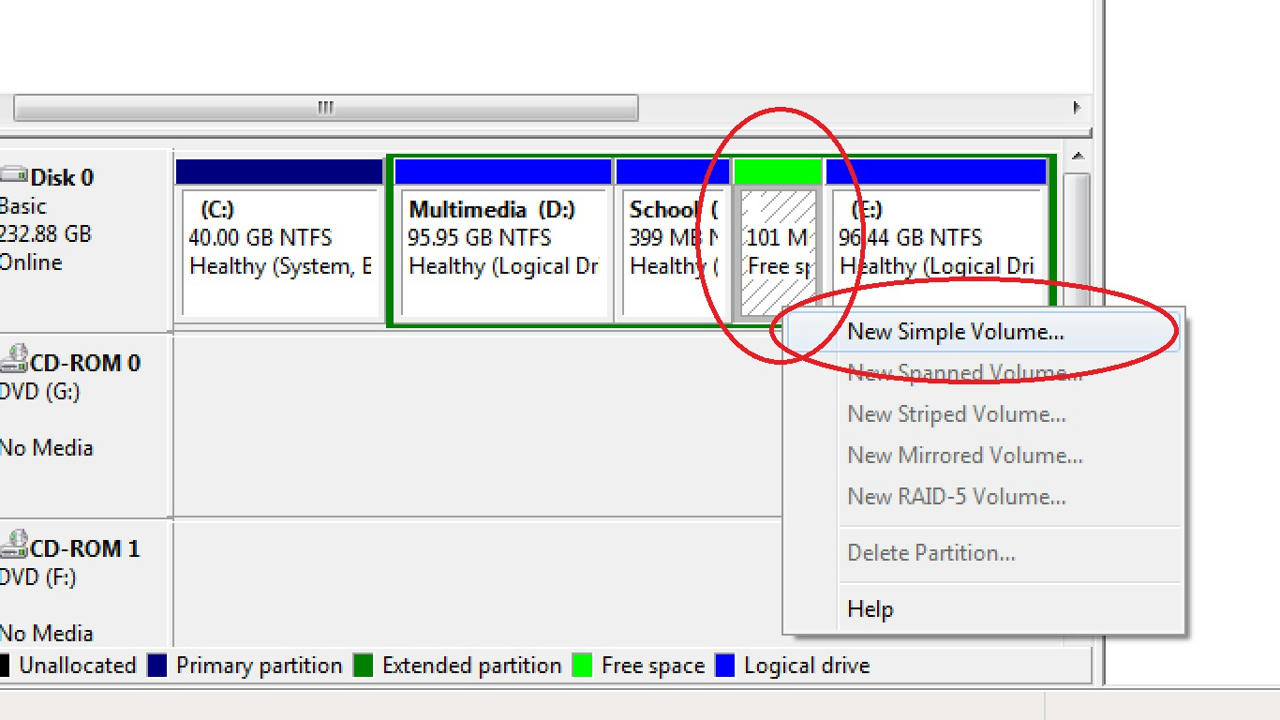
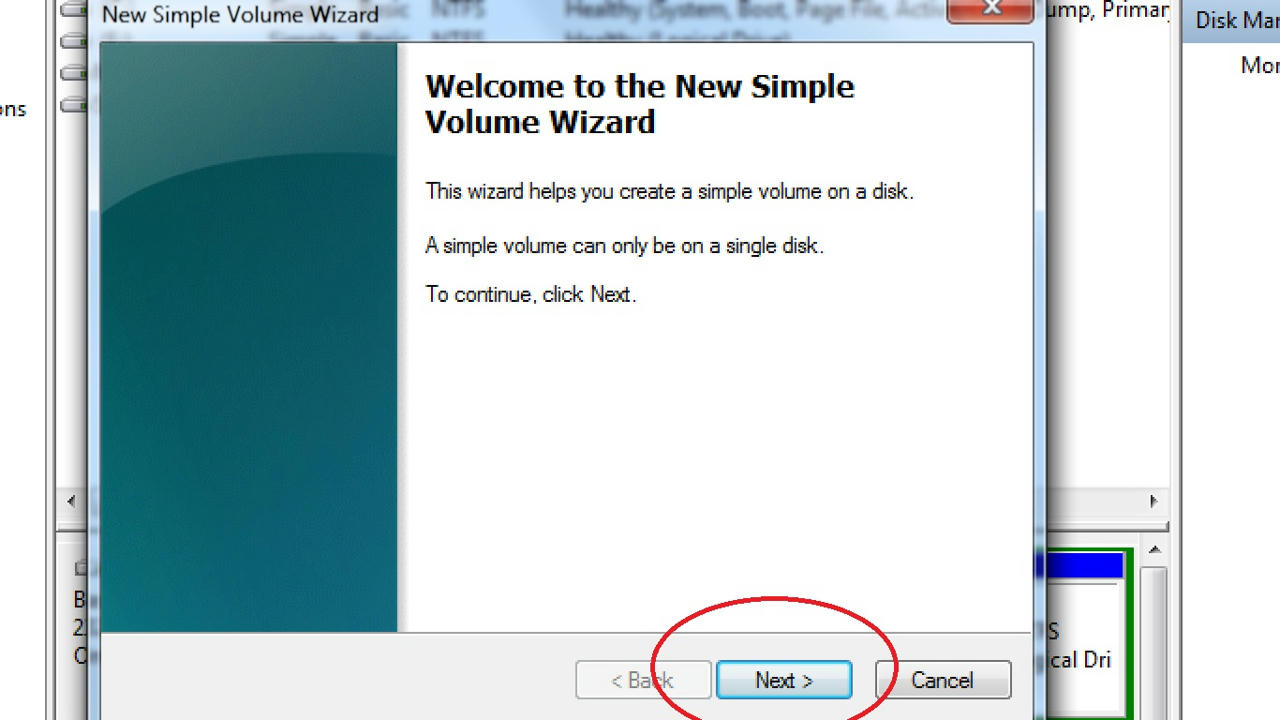
Step 5: Right click the green space labled 101 MB Free space and select New Simple Volume.
Step 6: Click Next.
Step 7: Specify the new volume size in MB and click Next.

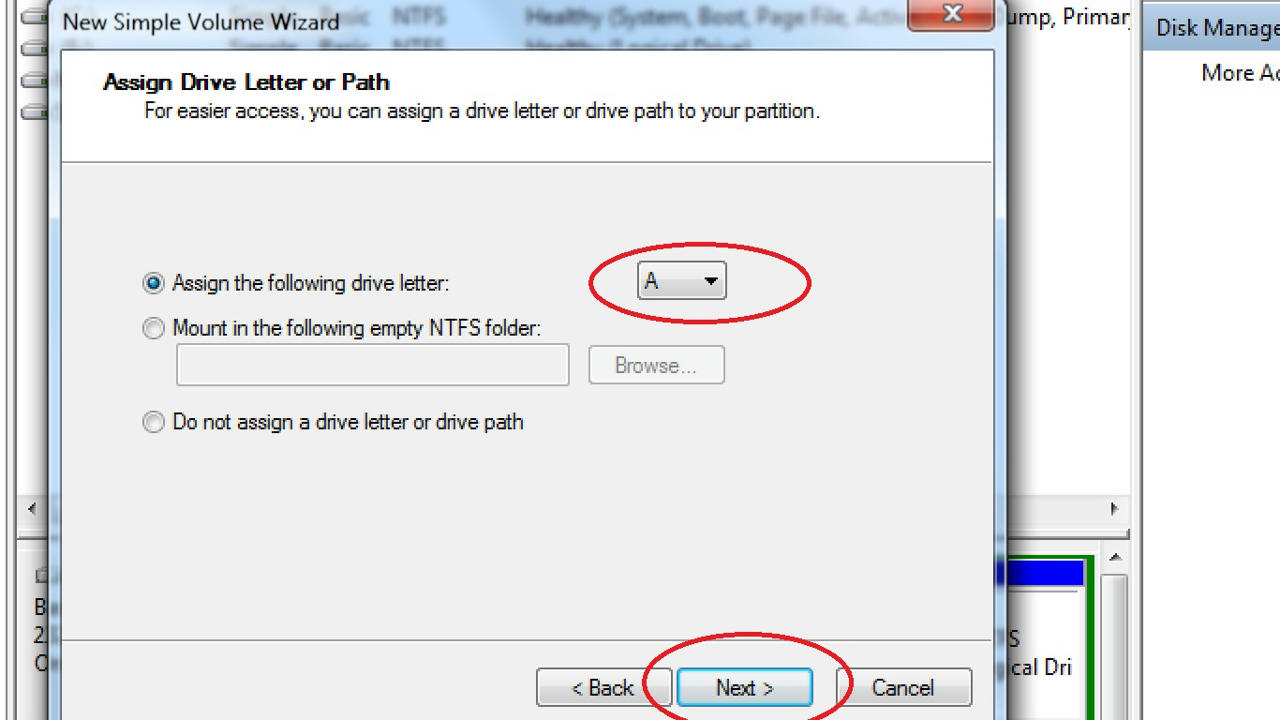
Step 8: Select a drive letter for the new volume and click Next.
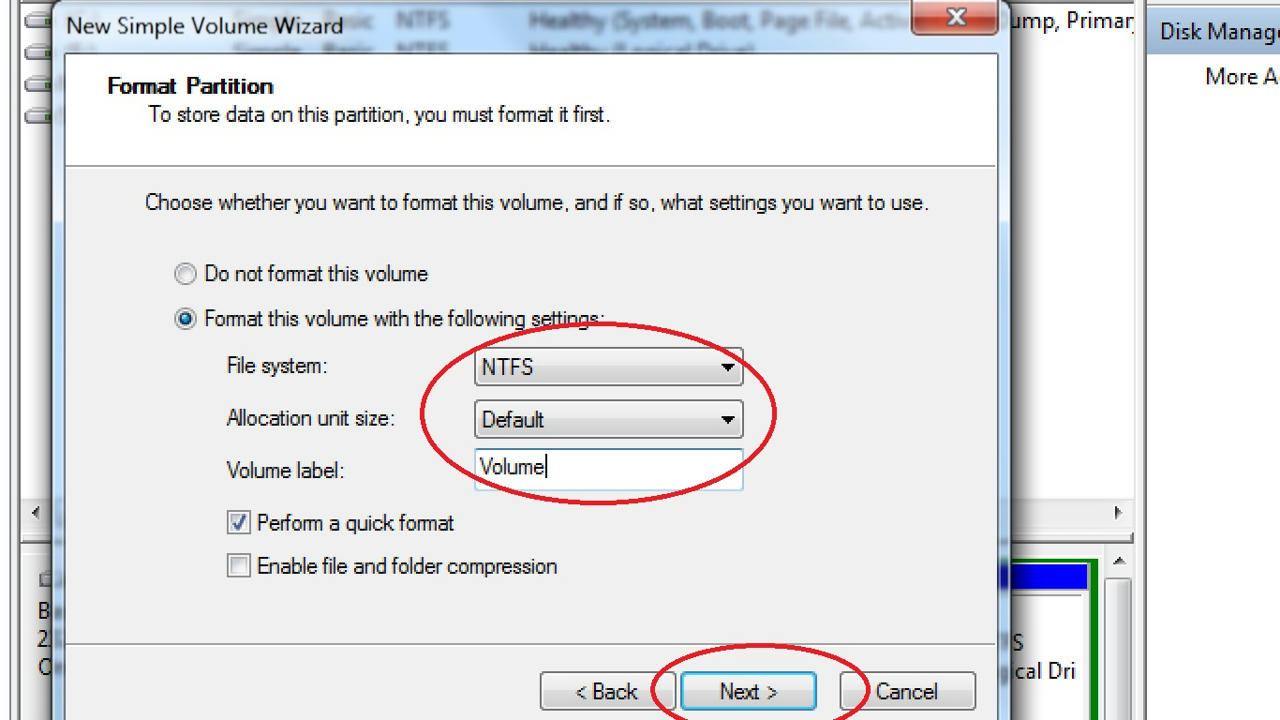
Step 9: Specify the file system, name and other settings for the new volume and click Next.
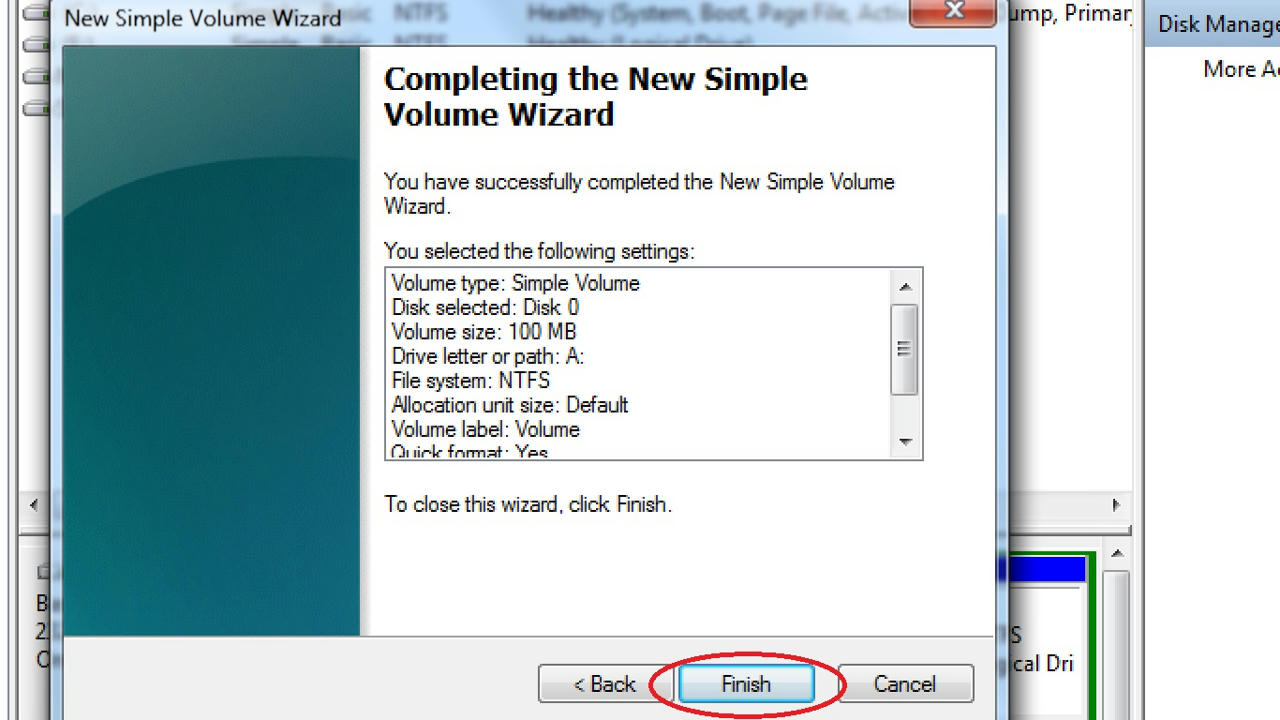
Step 10: Click Finish to create the volume.
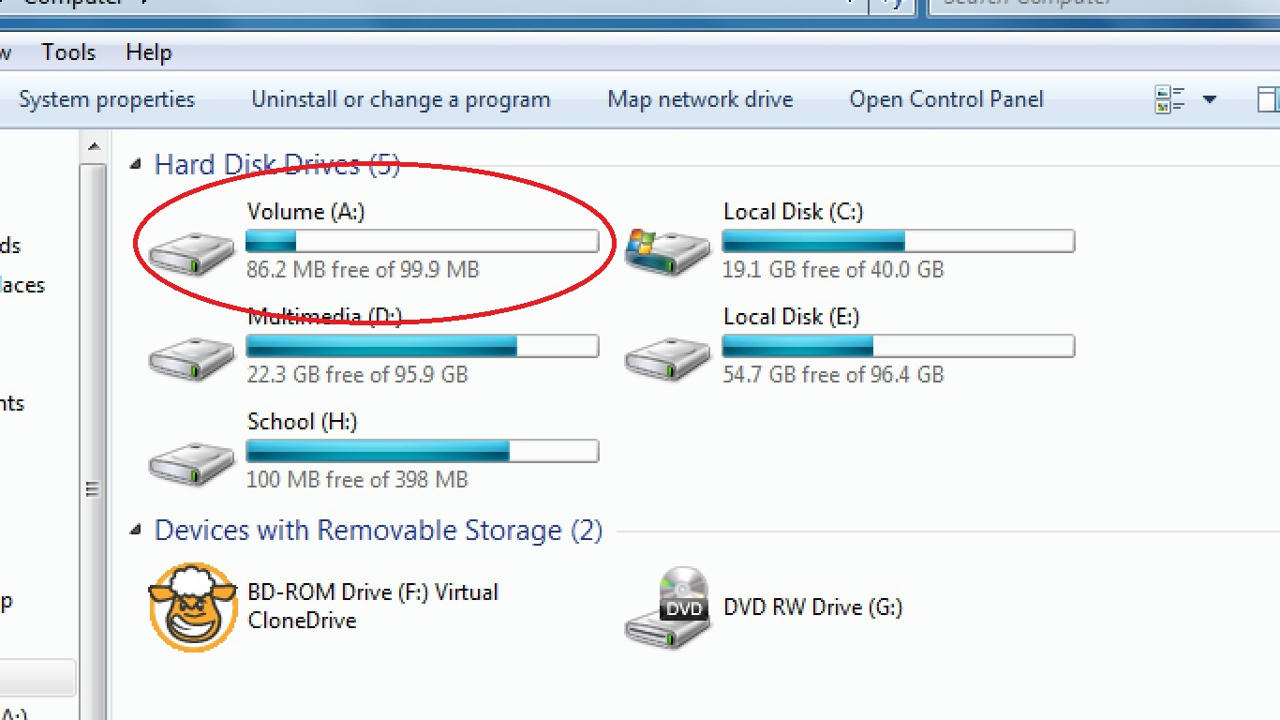
Step 11: Wait for a moment and open My Computer. A new volume would be there!


0 comments:
Post a Comment